V Shape
Window Tutorial
by:
Kathie Cureington
Thanks
to everyone who has commented on these
windows
and because you have asked for window
tutorials--
here is one for the V shape.I am doing
a seperate
one for the square ones.
This
is a Window looking out--We will put
text
on the window as you would see it looking out.
Choose
your graphic with a store, resturant, etc
in mind.
Think of a name for it.
Open
PSP
Open
a new graphic, It doesn't have to be a specific
size
to work on it and you can resize it when you are
finished
for what ever type project you want to use it in.
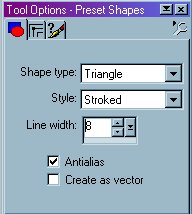
With
your graphic open, choose the shape tool
with
the below options checked.
Triangle
Antialias
checked
Stoked
Line
width 8
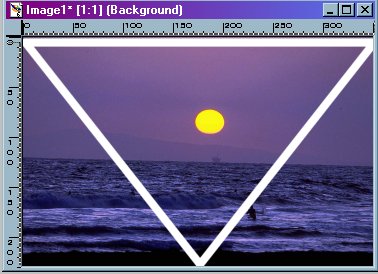
Select
white in your top color box.
Start
at the lower left hand corner and pull
the
triangle up until it touches the top
corners
and the point is centered
on the
bottem.
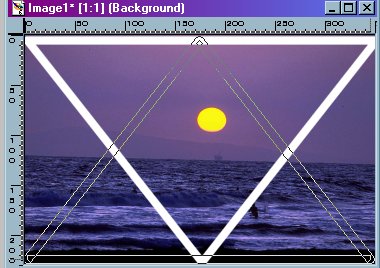
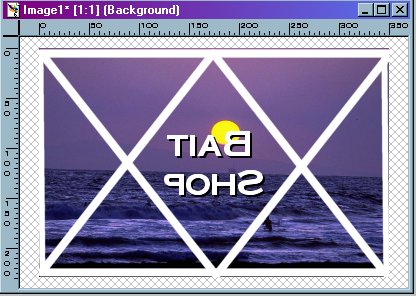
Starting
at the TOP left corner, pull a second triangle down.
The
point will be on the top this time and line up to the bottem
corners.
Click
on your Text tool..
Type
in the name you choose for your store.
Select
white as your text color,
center,
floating and antialias checked
I choose
Bait
Shop because of looking out at the water
and
fisherman. Choose a size font
depending
on the words you
have
and the size of your triangle.
You
might have to try it in your diamond space
for
size a couple of times. When it fits right, click okay.
Go to
Image/mirror. With the text still selected we will add
a drop
shadow.
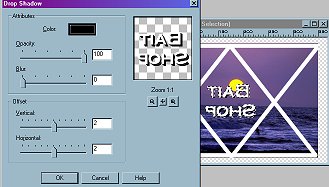
Opacity
100
Blur
0
Vertical
and Horizontal 2
Color
black
OK
Click
Selections/select none
Next
we will add the sides of the window.
Choose
white in your top color box
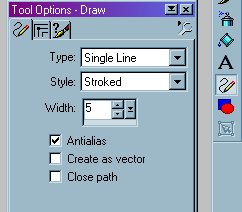
Click
on your line tool.
Choose
the selections below
Single
line
Stoked
Width
5
Antialias
checked
On each
side draw a line from the top to the bottem.
If a
little color shows we will cover it up with the border...
I left
some here so you could see how it covers.
Click
Image/ add border
In your
bottem color block choose a dark
color
from your graphic, or choose a color you
want
your wall to be.
I
checked symmetric and 25--you can
make
your border wider.
Click
OK
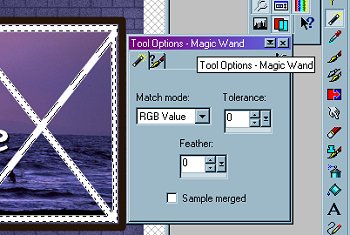
Click
on your selection tool.
(magic
wand tool)
Select
your border.
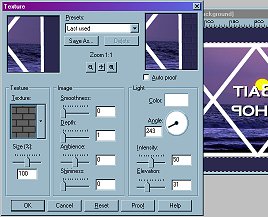
Go to
Images/
Texture
I used
medium bricks.
with
the following settings
Size
100
OK
Choose
a lighter shade of the wall/border color
for
your airbrush color. Have it in the top color box.
Click
on your spray can tool.
Choose
the following settings
shape
round
Size
95 Hardness 0
opacity
39 step 25 density 57
Click
the tab between the spray can and brush
in there
choose paper texture
Medium
bricks
Spray
over your border that is still
selected
until it looks nice to you.
Selections/
select none

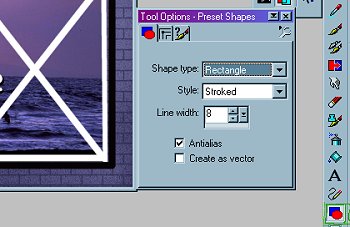
Click
on your shapes tool again.
Choose
Rectangle
Stroked
line width 8
antialias
checked
Use
a dark color in your top color box.
Pull
a rectangle shape around your window
matching
it up just out side the white lines.
With
your selection tool ,(magic wand)
click
somewhere in the white lines.
They
will all select and have
the
marching ants around them
Go to
Image/Effects/ Inner Bevel
and
add these settings.
Click
OK
You
can save this bevel setting--
click
save as and name it window
or something
you will remember.
I used
the same settings in both
window
tutorials.

This
is your finished image.Now you can resize it.
You
can add a border for side scroll, use it as top scroll
How
ever you want to use it.
This
is just basics in making the window design.
I hope
you will have fun and try using it in
many
different ways creating your own
unique
images!!!