EMBOSSED TEXT
psp7
Several people has asked me how I do the
embossed
text, some people call it a watermark text.
This is a
tutorial on the way I do it...
open a new selection in PSP
I start with 300 Wx200H
with white background.
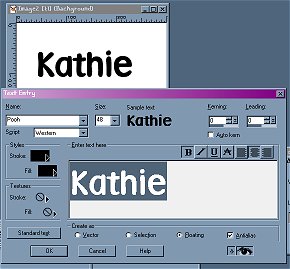
Click on the Text tool.
I used a font called POOH
Download it from my
Fonts
page
size 48
with both Stroke and Fill Black
Click Selections/select none
Now we will make it a little smaller around
the edge to save it.
You don't need very much of the outside
edge
because you will be copy and pasting it
on a new image as a new layer to use it.
With selection tool, on rectangle, feather
0
select just up to the edge of your text.
Go to Image/crop to selection

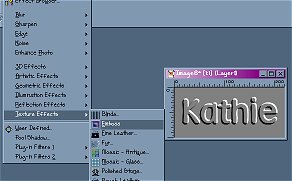
Go to Effects/Texture effects/emboss
It will be a funky gray color.
Save as a jpeg. I have a folder with
several different styles and fonts
I have made saved in. You
will need to open this from the file
each time you want to add it to
a graphic
Open your saved embossed name. Right click
on the title bar of it/click COPY
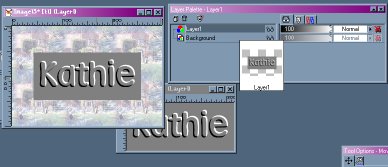
Open the image you want to add the embossing
to. Click to make that image active.
Right click on the title bar and click Paste
as new layer. You can
move it to where to want it. You can also
resize it at this point.
Make sure the layer with the text on is
the active layer
Go to Image/re size. Be sure the box
resize all layers is not checked.
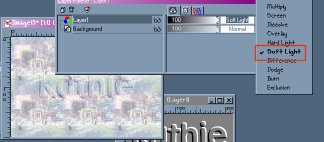
On your layer palette window..with the text
layer the active one
click the small down arrow on the far right.
You will get a drop down
box. put a check by Soft Light
You will then see your text turn transparent.
Go to Layers/Merge All/ Save

You can also use ding bat fonts to emboss
with
I made the fish the same way as the name.
Added the letter l ,selected a Li'l Fishie
ding bat

This is with the same Word Kathie and
the ding bat on a colored ,textured
background.

The possibilities are endless ,
adding your
signature, or adding a design to your work.
Have Fun
Return to Tutorial Pages here

Return to
