Using The Clone Tool in PSP6
Open PAINT SHOP PRO 6
1.File\Open ...Open your graphics in PSP6 ..
Go to View\Tool Bars\check everything except Histogram. Click "OK"..
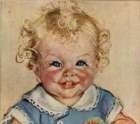
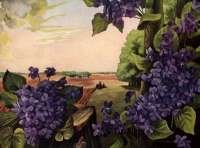
2. Choose two graphics that will compliment each other.
This also works well for photographs.
We will use the originals later in the tutorial so you need to
3.Make a duplicate of each by clicking Shift/D.
4. For each original click Image/ resize/ width 250/ OK
5.Name the first one image--The second one background
File\Save as.. Scroll to Save in : C:\Lisa\Images.File Name:
(name).jpg...
Save as Type: click on the black down arrow button
and select "JPEG-JFIF"...click on OPTIONS..
Select "Standard Encoding"..Compression factor 40%.
.Click "SAVE" to save it.
6.Close the saved originals . We will use the duplicates to make
our new graphic.
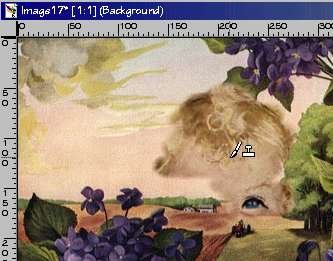
7. We are going to clone-or transfer--part of image picture into the
background picture.
Try to choose pictures that are near the same size.
We will resize the final one. The cloning is easier to
do on a larger image.
8. Select the clone tool.
It is the 11th one down from the top
![]()
9. Set the clone mode, on your drop down tool bar, as "aligned". Select
a brush tip size of 21,
shape round, with opacity and density both set at 100.
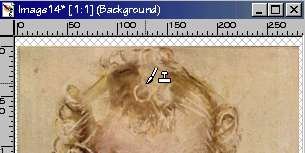
10.The first thing you must do is set your source for the clone tool.
Do this by placing the cursor on your first one(image ) at a specific
point,
(make note of the location numbers on your status bar)
![]()
and RIGHT click your mouse. You will see a cursor like a brush and a stamp
Now go to your Background graphic
11.On your background graphic click Layers/New Raster layer/OK
12. Now move your cursor to your background image
to the point on the background where you want
your image to transfer .
Or check you status bar and start it at the same numbers in your background
graphic
as you used on your image graphic, and press and hold the left mouse
button.
Moving the cursor over the clone image will deposit color from the
source.
You will see an X moving on the first image as it copies it.
Start by slowly moving over the first subject.
For this effect it is much like coloring in a color book.
Release the mouse OFTEN. Stopping and starting as you go.
That way, if you make a slip and go outside the subject you want cloned,
you can backup in steps and won't have to start all over from the beginning.
You never have to return to the source image.
As long as you don't right click you can stop and start
as often as you wish and move your cursor anywhere on your clone
and PSP will remember what color to deposit
Or, if you need to enlarge the image more, you can choose the zoom
tool ,
enlarge, and return to the clone tool. It will still maintain the alignment.
It also does not matter if your source is smaller than your clone while
you are working.
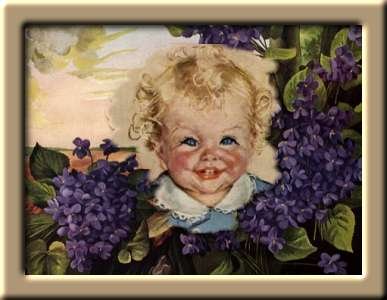
13.When your image from first graphic looks like you want it to on
the background one ----
go to Image/Effect/ Drop Shadow
Color Black Opacity 100
Blur 6 Vertical 3 Horizontal 3
Click OK
That gives a shadow to the image you just cloned.
14.Now we will resize this combined graphic
Click Image/Resize/ width 250/ OK
15.Choose color # C0A782 in the bottem of the color box
on the tool bar
Click Image/ Add Border/
Symmetric checked
25 in each box
Click OK
16.Click on the magic wand-- 8th tool from the top.
RGB Value Tolerence 0
Feather 0
17.Click into the border area and you will see the "marching ants"
around your border.
18.Click on Image/ Effect/ inner bevel, choose these settings
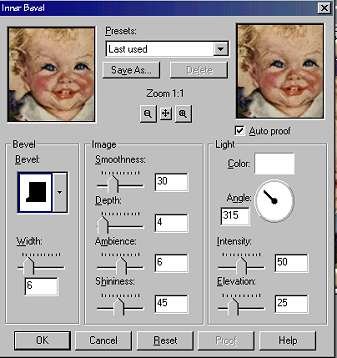
19.Click OK.
20. Click Image/effects/drop shadow
Color Black Opacity 100
Blur 6 Vertical 3 Horizontal 3
Click OK
This is your finished image