Cat Blinking Tutorial
by Kathie Cureington
I have had several people asking
me how
I make the antimated eyes.
I decided to
write a tutorial fot this
one.
Open PSP
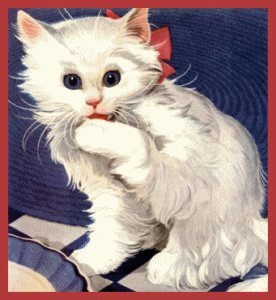
File/ Open/ Choose a graphic
with at
least one eye showing plainly.
WE need to put a frame or boder
on now.
I choose just a simple border
for this one.
I used the color picker and
choose a color
from the bow.
Be sure your color is in the
bottem color box
(circled in green) and with
Symmetric checked
I choose size 10 border.
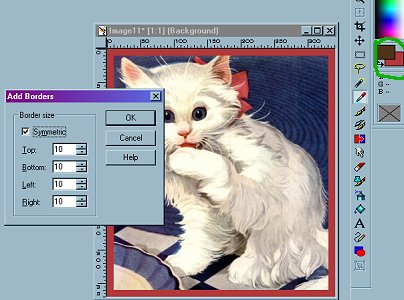
I didn't do anything to my
border, but at this
point you could add a bevel,
blade pro preset,
eye candy or just any favorite
border you like.
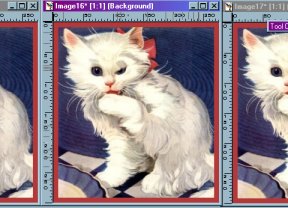
Make 2 copies of you image,
using Shift-D keys
I like to line my images up
to work on them.
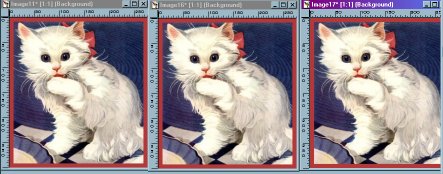
The first image you will make NO changes
to
Save as a Jpeg-named Cat 1
I have a folder named work
and I make a sub folder in there for each
animation project.
Select the the second image,the title bar
will be hilighted.
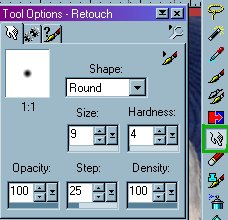
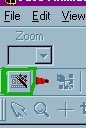
Choose the Smudge tool. It is the little
hand.
I use these settings.
Start at the top of the eye and lightly pull
down with your smudge tool,
You will make the eye look half way closed.
Save as a jpeg named Cat 2
Select the third cat picture
You will use the Smudge tool again with the
same settings and pull the white down until
the
eye looks closed. You can always back up
with
Edit/Undo if you don't like the shape and
rework it.
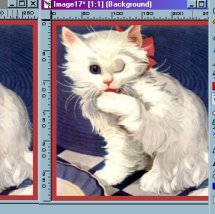
Save as a Jpeg-named Cat 3
Now for the FUN part!!
Go to file/ Run Animation Shop
When the program comes up
You will use the Wizard--click
on this little button
on the top left corner...
This box will come up...........
Click the top button,same as the first image.
Click Next
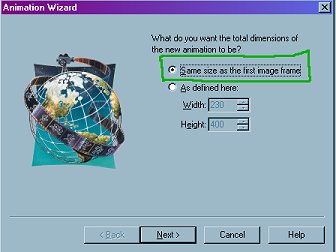
You will have these choices--choose transparent
click next
![]()
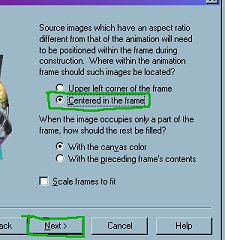
You will get this box.
You want to center the frame
and
with the canvas color on the second choice
Click next
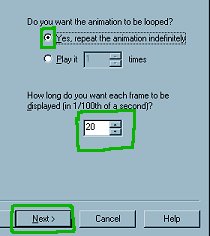
You will get the following box
Click to repeat animation indefently
put 20 in the next box.
Click Next
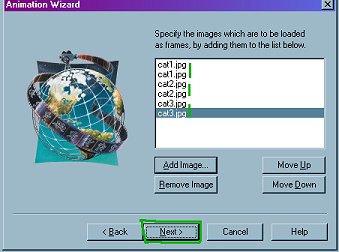
You will get a box to select your 3 cat files
you just saved
When you click Add Images--you will get
the second box up.
Got to the folder you saved the three cats
in
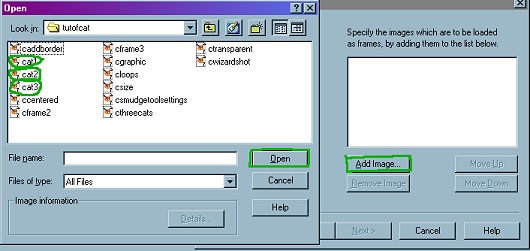
Click on cat1/Click on open. It will show
up in the Add Images box.
Click Add images again/Click on Cat 1. again
Click open again.
You will have 2 cat1's
Click on Add image/Click on cat2/open.
Do that again to get a second cat 2
Do the same thing for your cat3 image.
You now have 2 copies of each graphic in
your box.
Click next
You will get a box saying the wizard is ready
to finish your animation
Click Finish
Your antimation will pop up in frames.
To see how it looks go to the top right
on the toolbar
and click the little film square.
(You can also go to view/ antimations on
the top bar)
![]()
Your animation will come up and preview.
If it looks like you want it to you can
now save it.
If you do not like
it close out animation shop and you can rework
your graphics in PSP
and try them again.
Go to File/ Save as/
It will automatically save it as a .gif
file
Be sure to choose a name for it.
I have a folder just for my finished animations.
Click Save
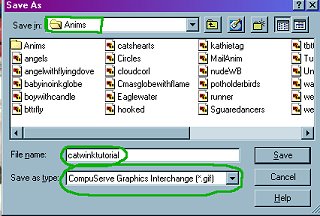
You will have a box come up with a Slider
on the left
and on the right saying better image quality.
Change nothing and click Next
You will get a box saying
wait for optimising.
When the little squares stop filling the
lines click next.
It will show you the optimising results.
Click finish and it will be saved.
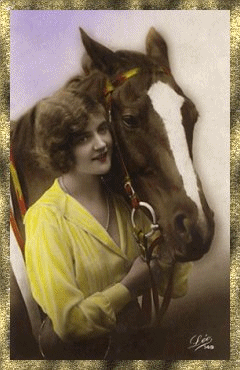
Just to show you another example of an
animal winking. You can also do
this with people.
HAVE FUN!!!
To Return to my index page
KCGraphics
Click here